How to Create ZATCA-Compliant POS Invoices and Refunds in Invent ERP?
How to Create ZATCA-Compliant POS Invoices and Refunds in Invent ERP?
Invent ERP’s Point of Sale (POS) system is fully integrated with ZATCA e-invoicing regulations in Saudi Arabia, allowing businesses to issue simplified invoices and refunds directly from the POS while automatically submitting the required documents to ZATCA.
Step-by-Step Process
Creating a POS Invoice
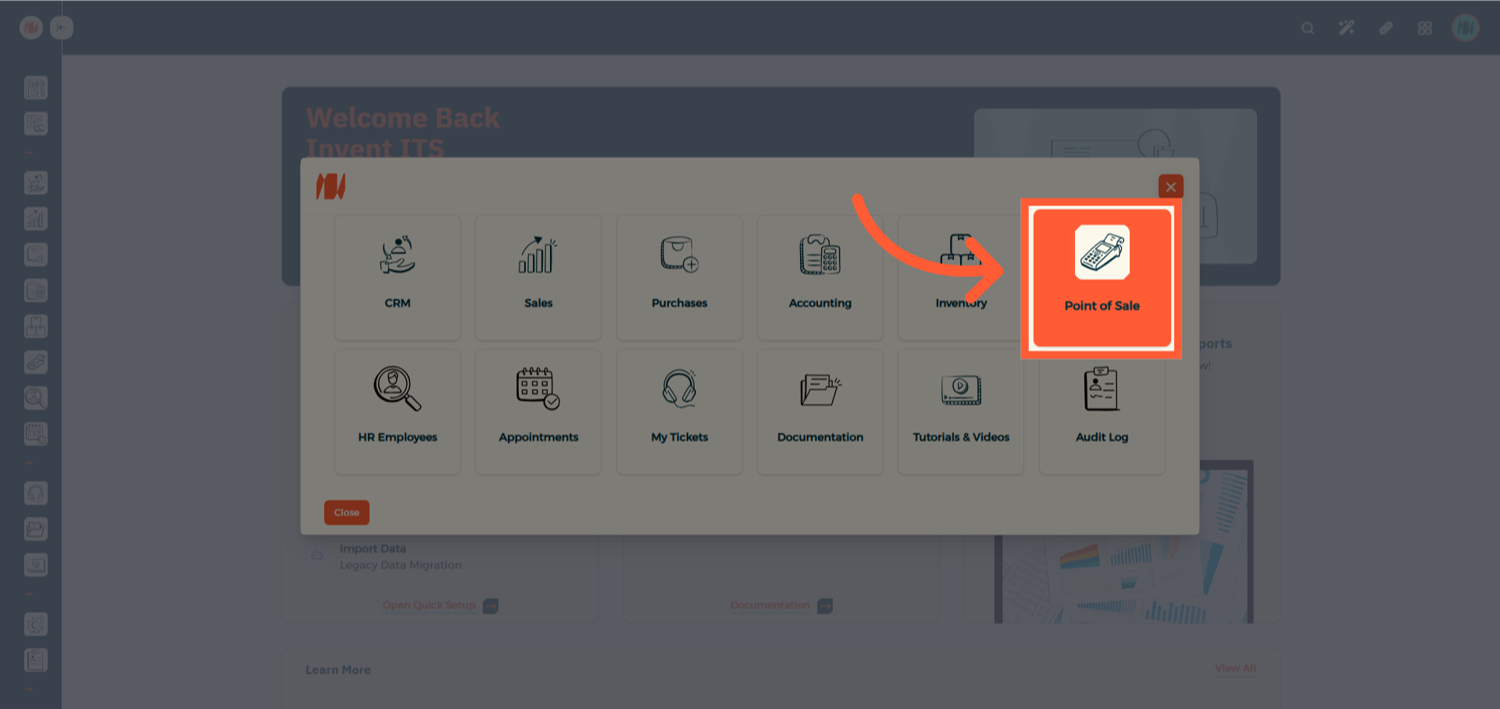
Step 1: Open the Point of Sale
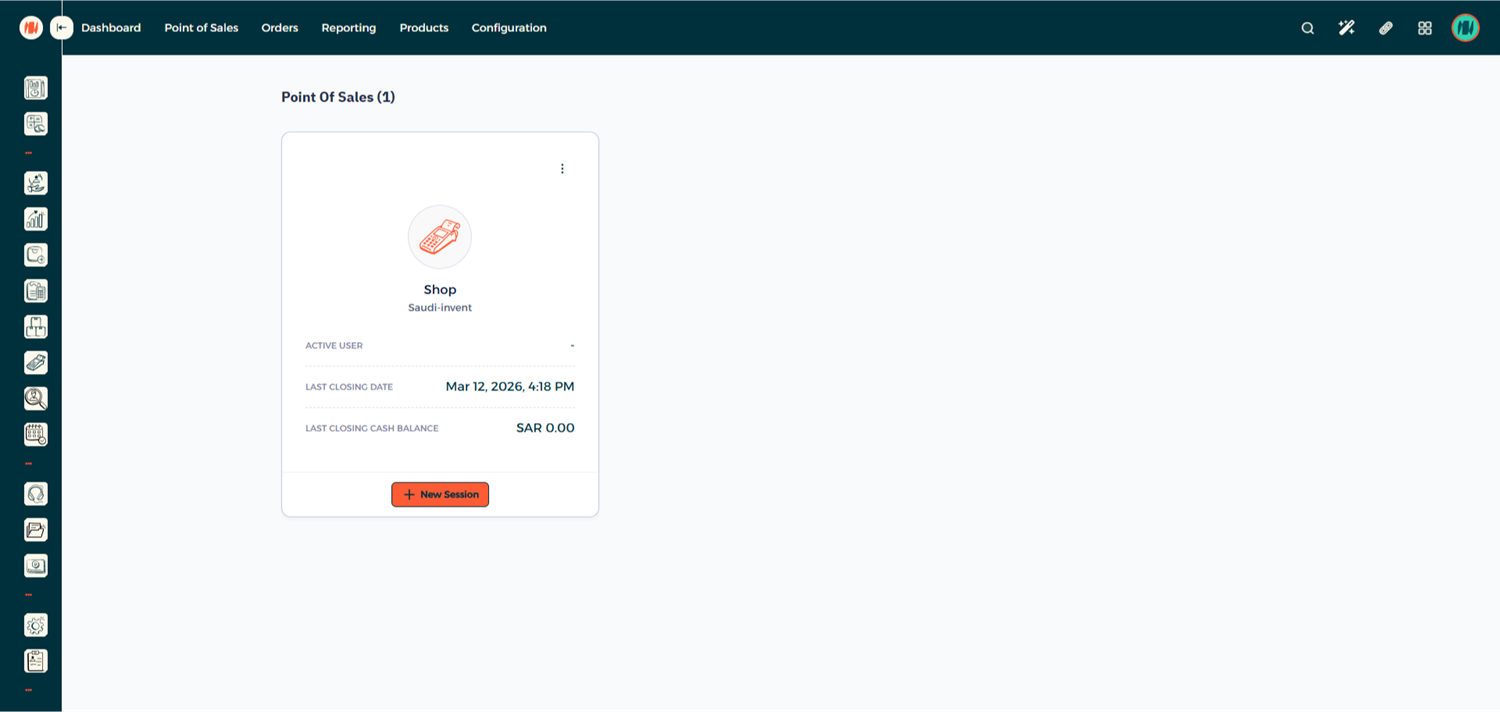
Step 2: Enter Your POS Session
Select and enter your POS session.
Step 3: Start a New Order
Begin by creating a new order in the POS.
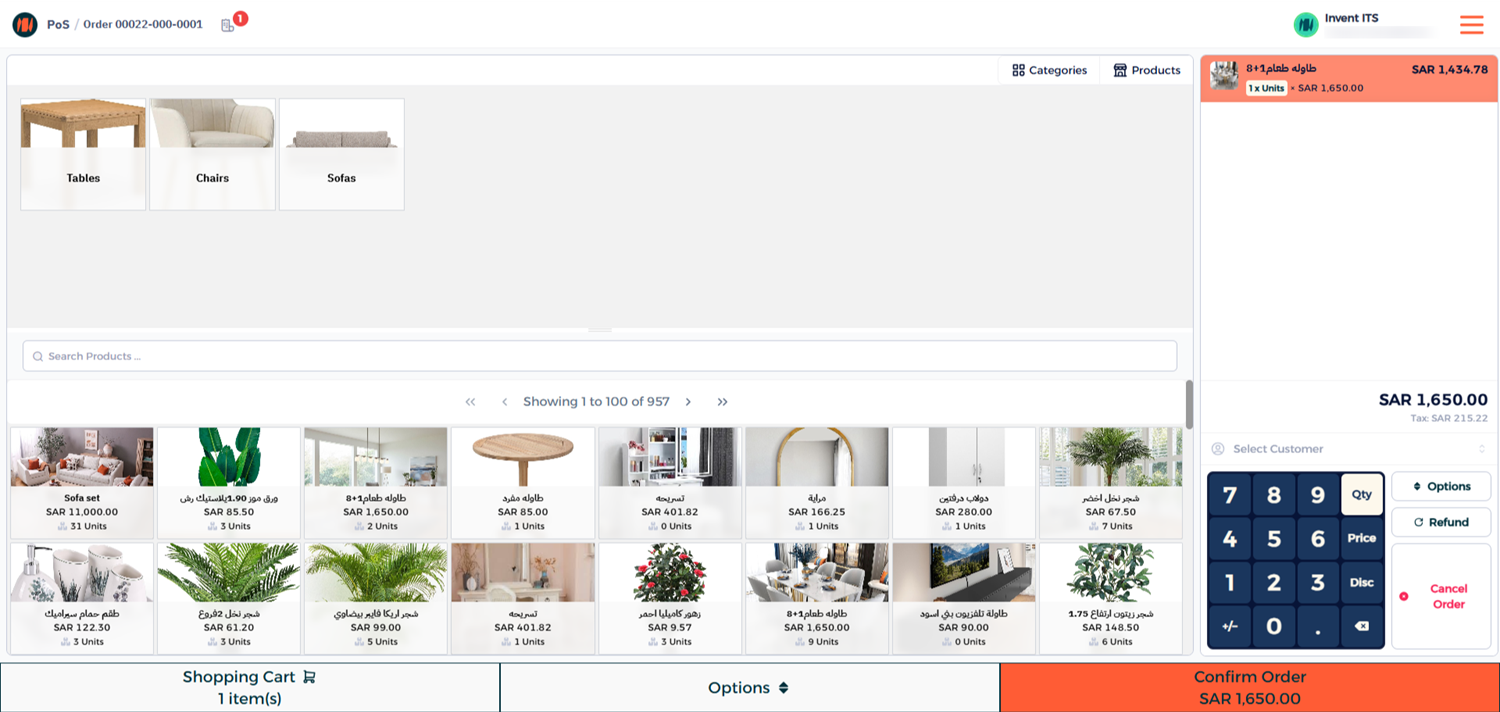
Step 4: Select the Customer
Before completing the order, make sure to select the customer.
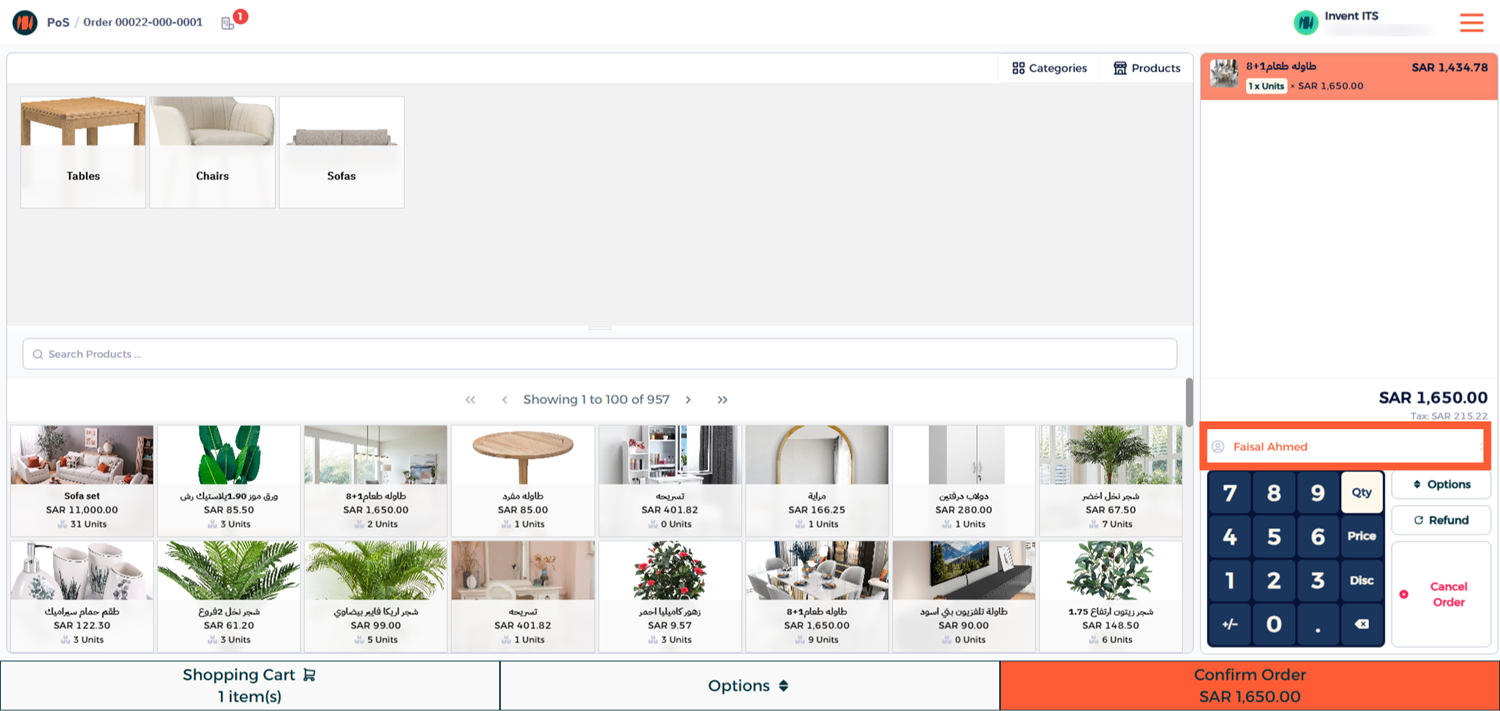
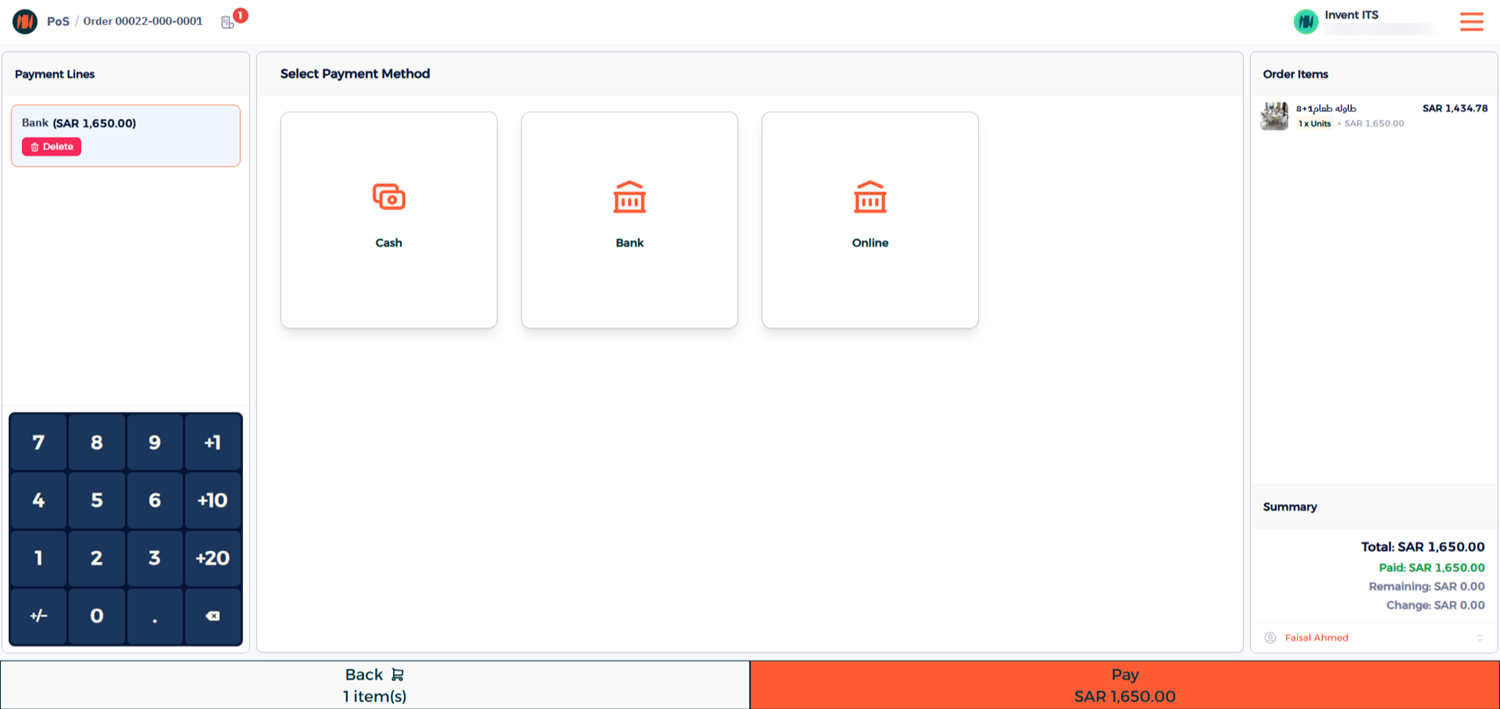
Step 5: Complete the Payment
Choose the payment method and click Pay to finalize the transaction.
Once the payment is completed, the system will immediately generate a simplified invoice within the POS interface.
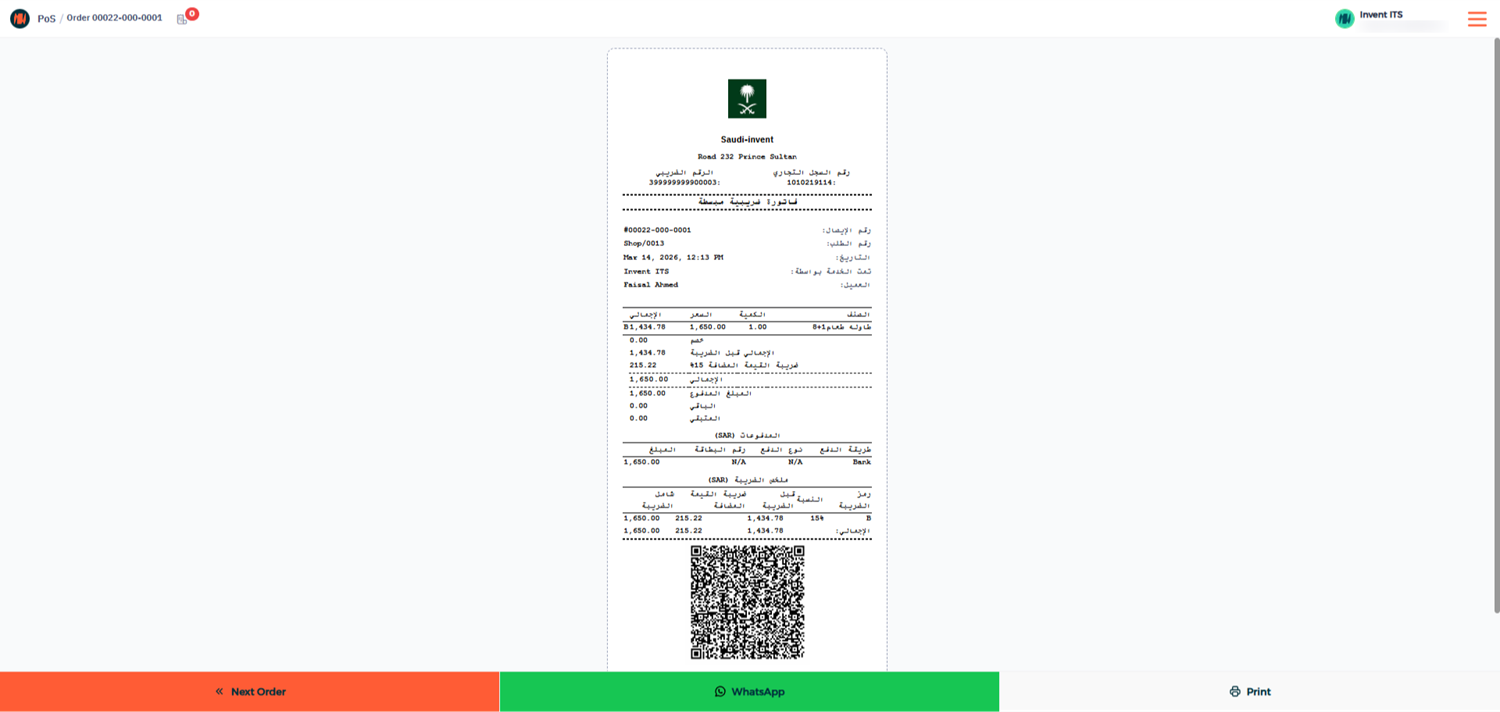
At the same time, Invent ERP automatically:
- Creates a standard invoice in the backend
- Submits the invoice directly to ZATCA for validation
Step 6: Verify the Invoice Submission
To confirm that the invoice has been successfully submitted to ZATCA:
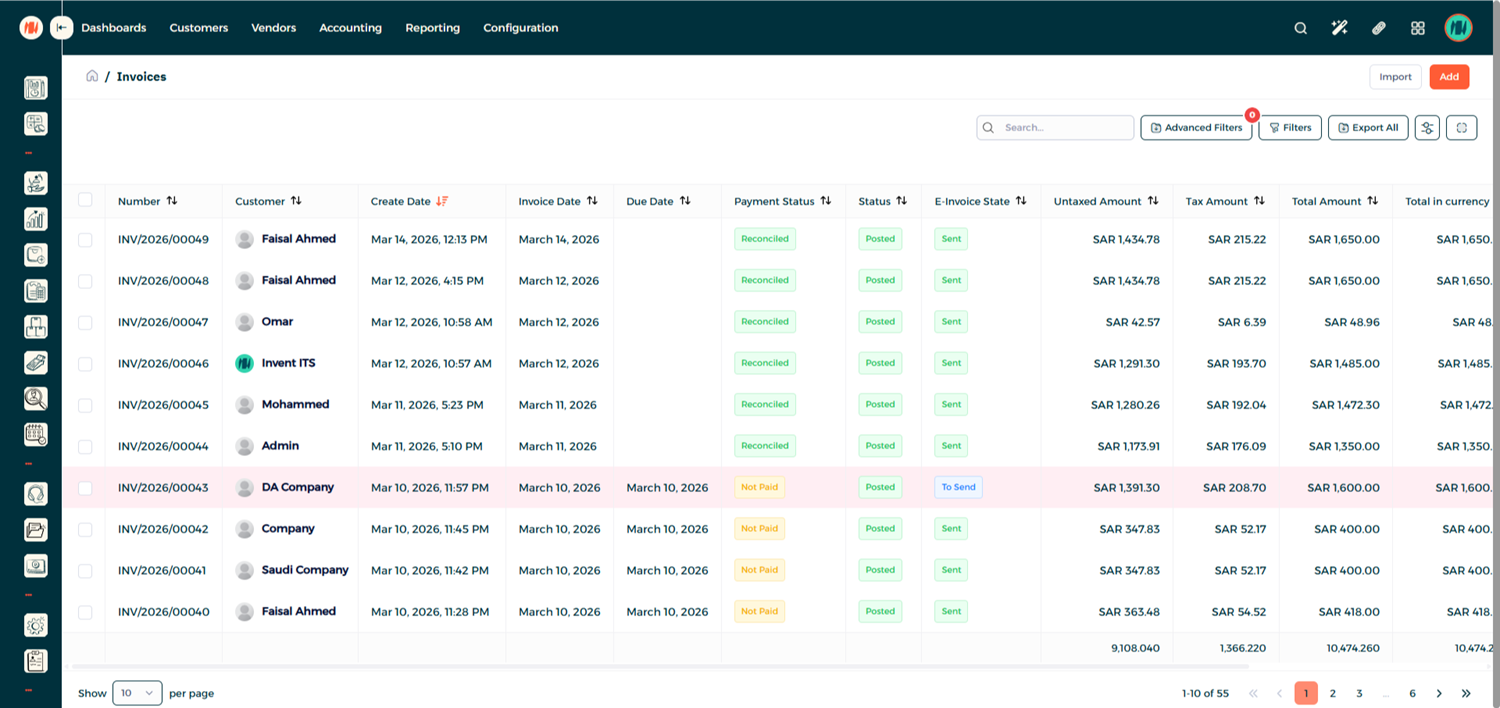
1- Go to the Invoice List in the system.
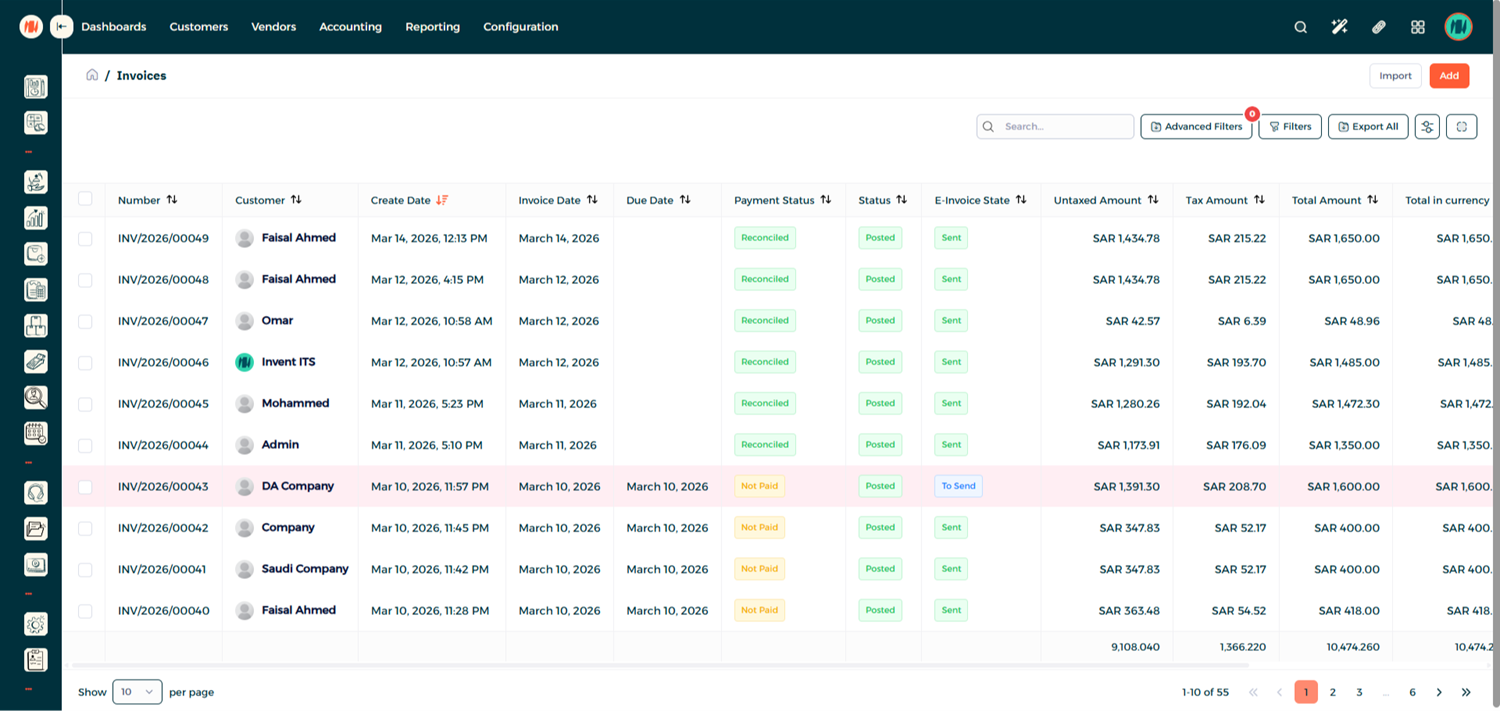
2- Open the invoice you just created and you will see that the invoice has been automatically submitted to ZATCA.

Taxpayers must submit the Simplified Tax Invoices within 24 hours
Processing a POS Refund
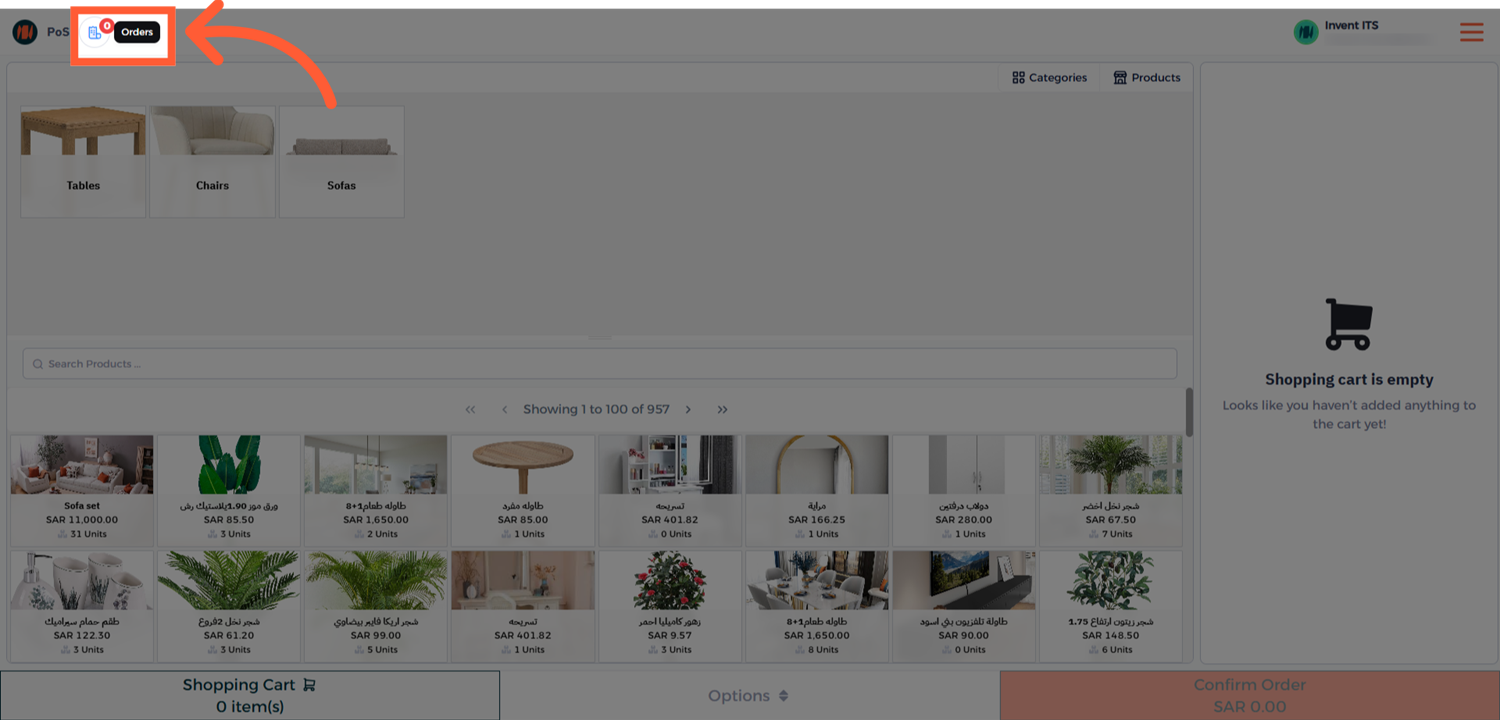
Step 1: Open the Orders Menu
From the Point of Sale interface, navigate to Orders and the open Paid Orders.
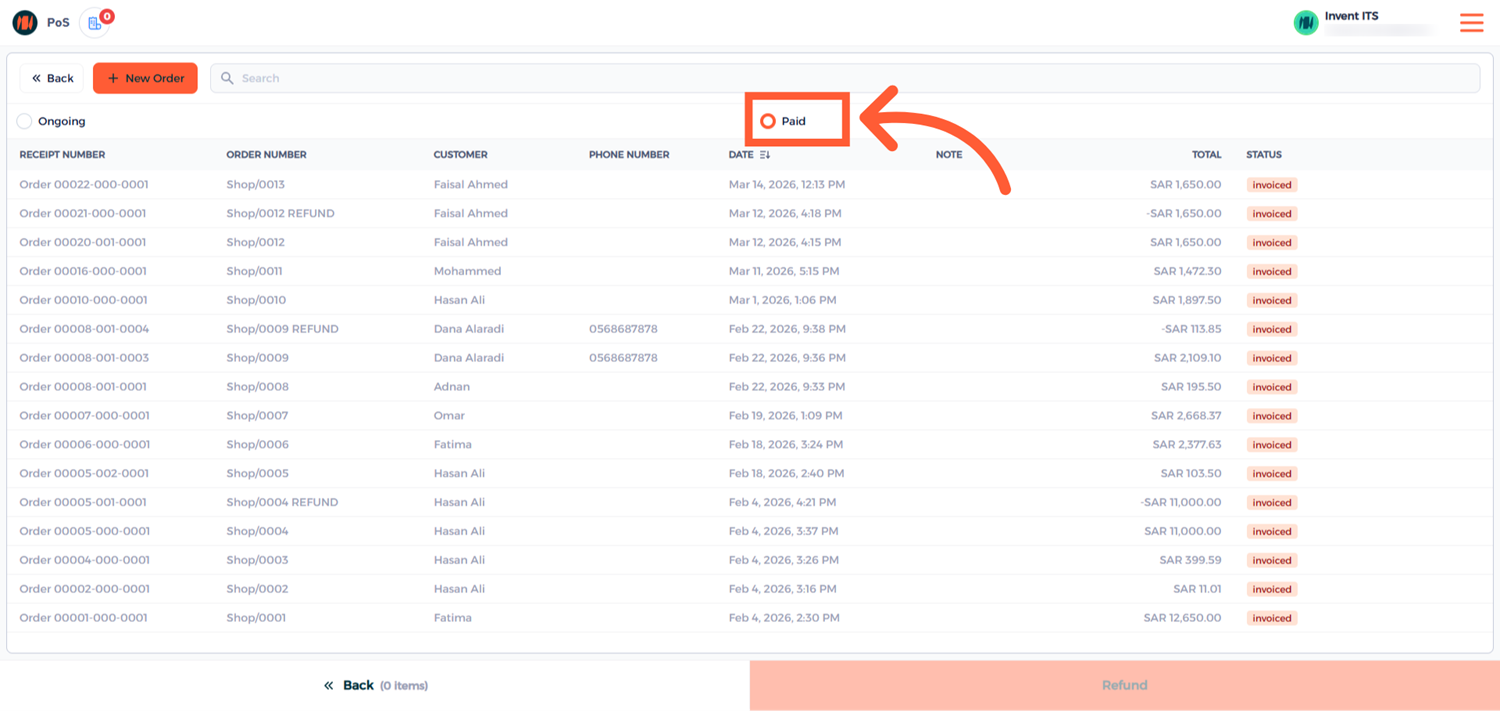
Step 2: Select the Order to Refund
Select the order you want to refund, enter the quantity of the items you want to refund and click Refund

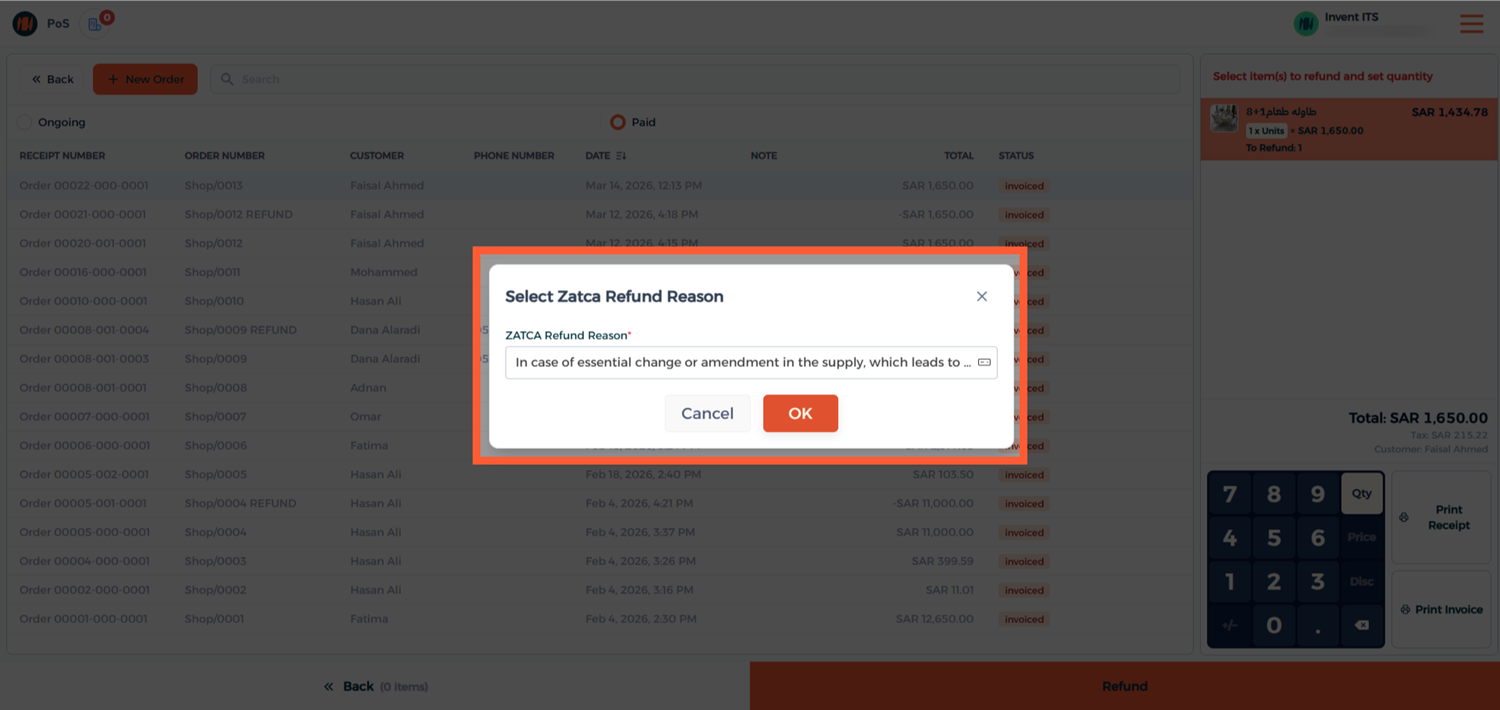
Step 3: Select the Refund Reason
A window will appear displaying ZATCA predefined refund reasons.
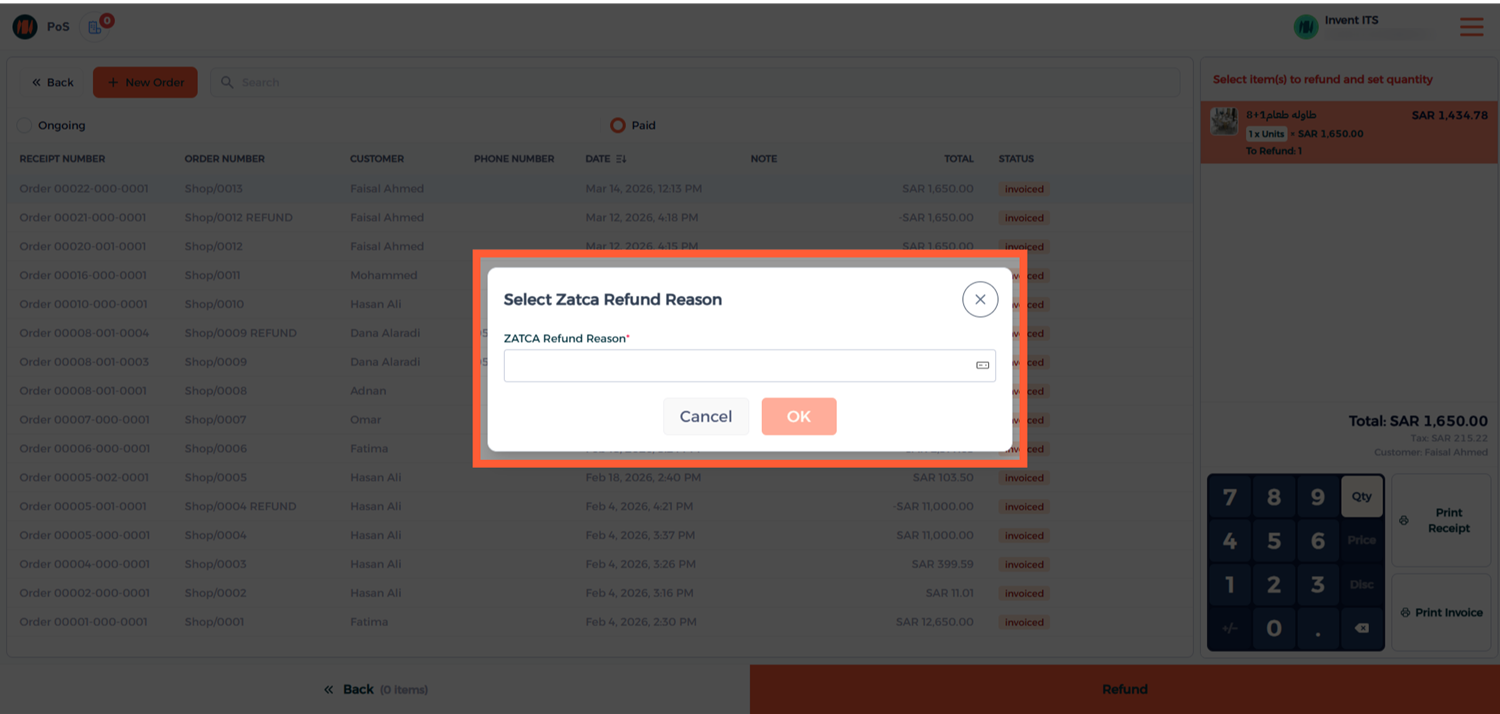
Select the appropriate reason that matches the refund scenario.
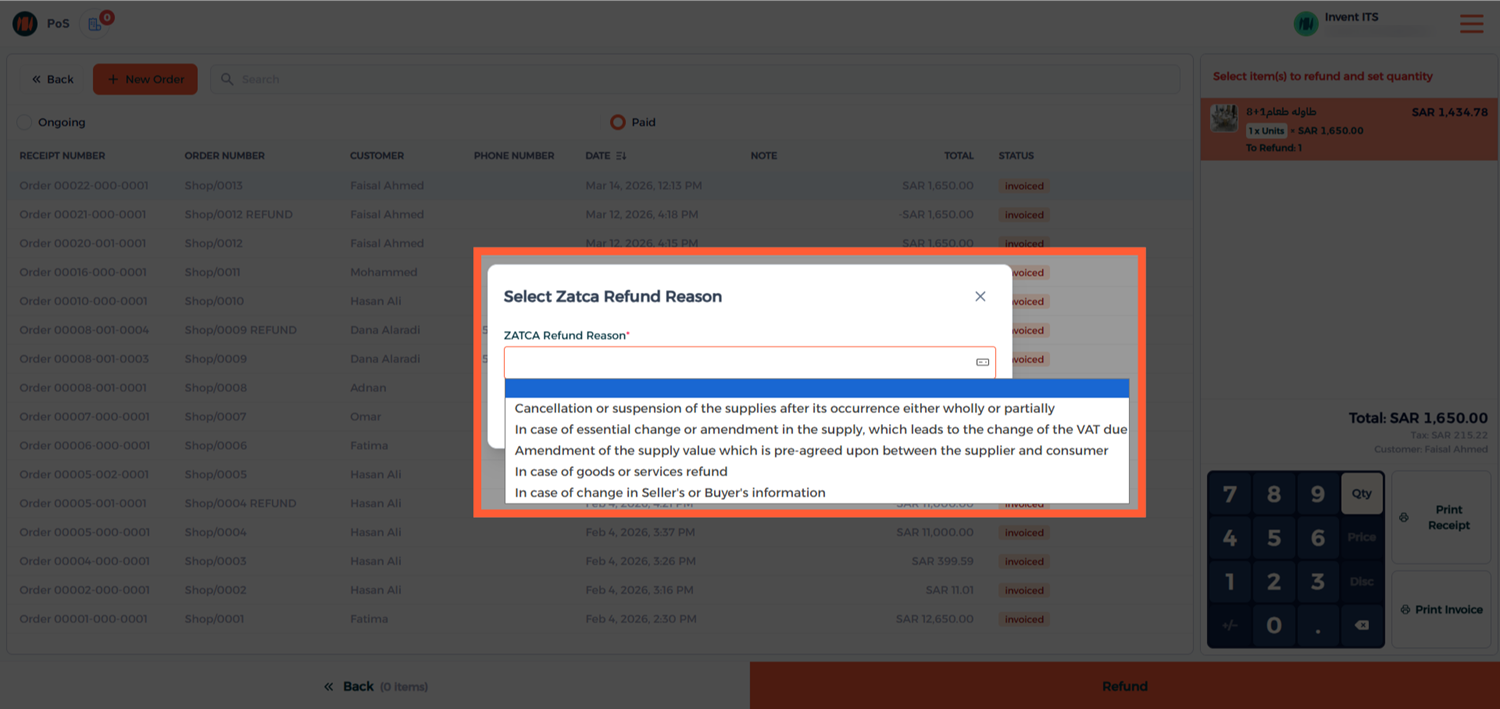
After Selecting, click on OK
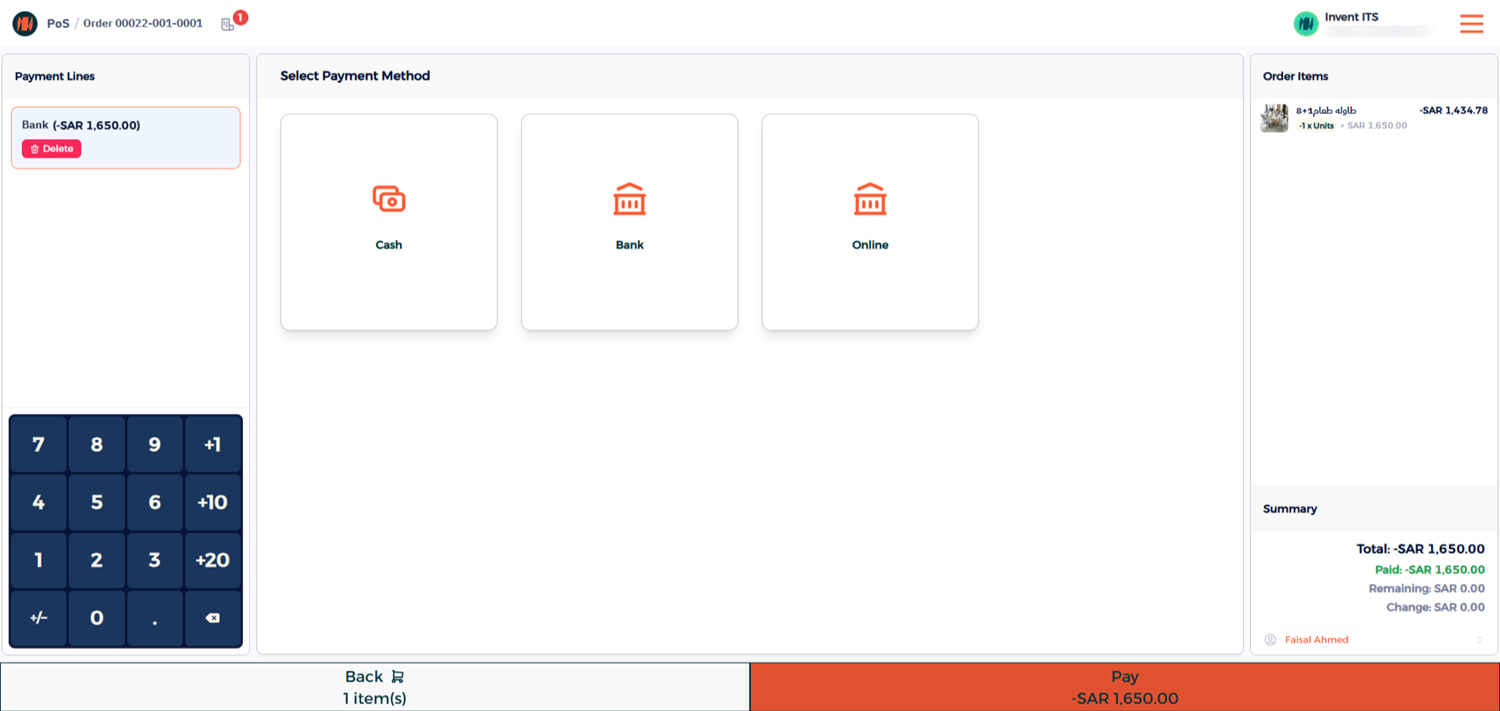
Step 4: Confirm the Refund
Confirm the refund
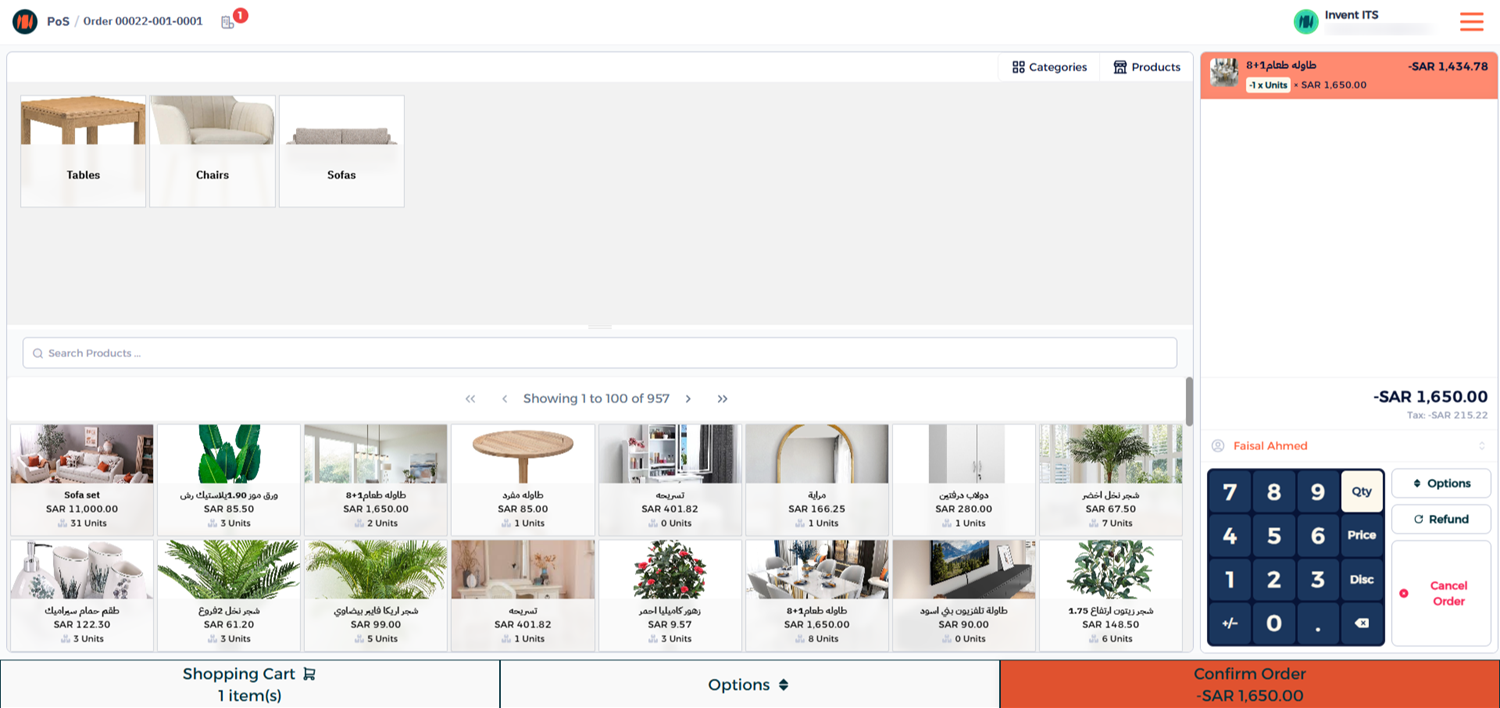
select the refund payment method
Once completed, the POS will generate a simplified credit note.
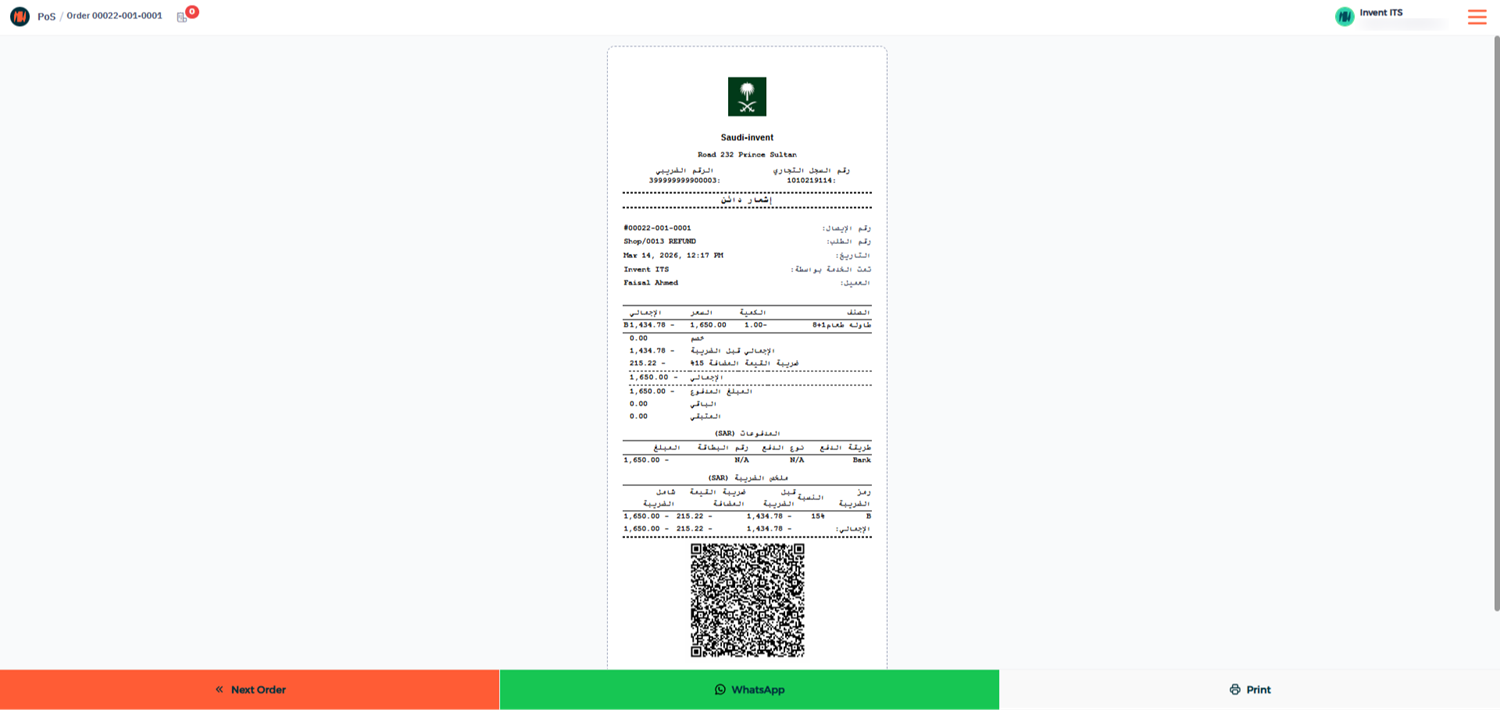
At the same time, Invent ERP automatically:
- Creates a credit note in the backend
- Submits it directly to ZATCA
Step 5: Verify the Credit Note
To confirm the refund submission:
1- Go to the Invoice List.
2- Open the original invoice related to the order and you will see the linked refund transaction.
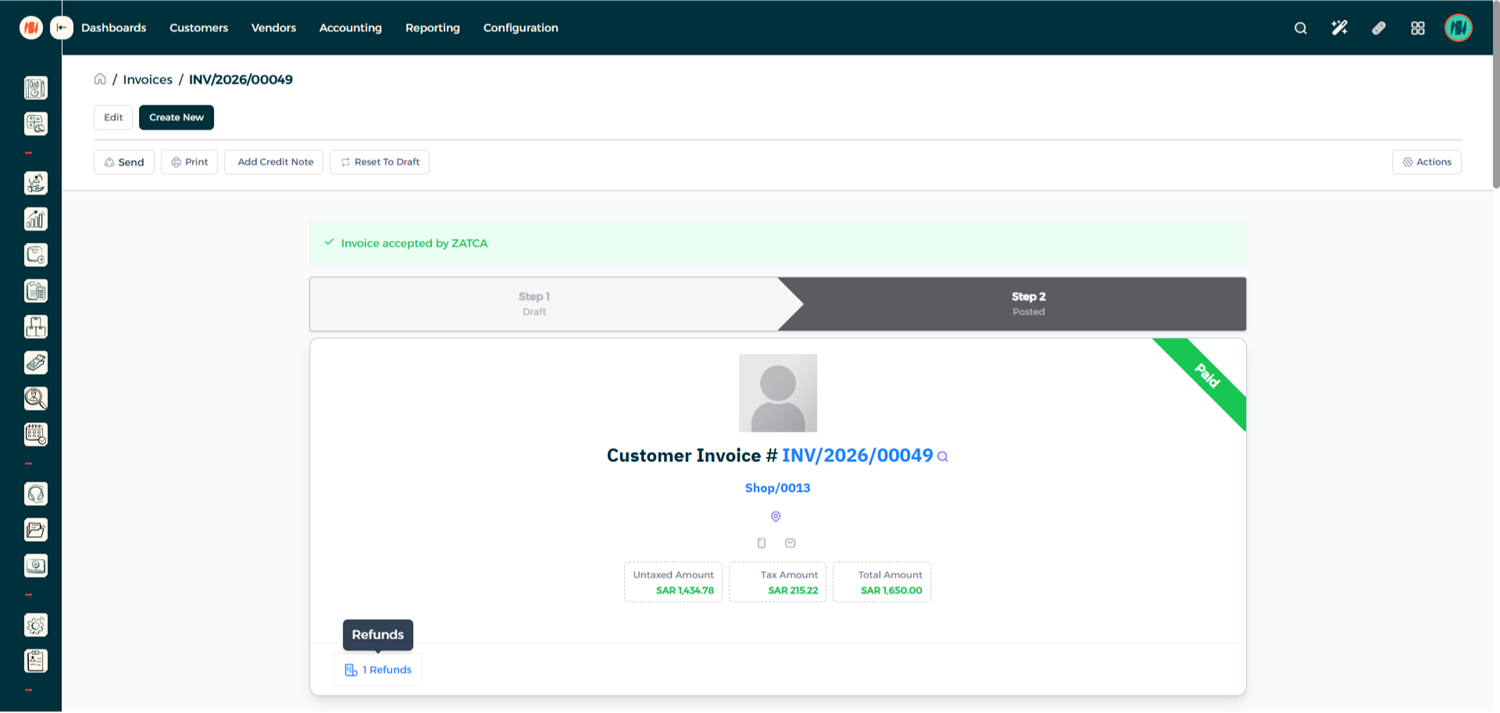
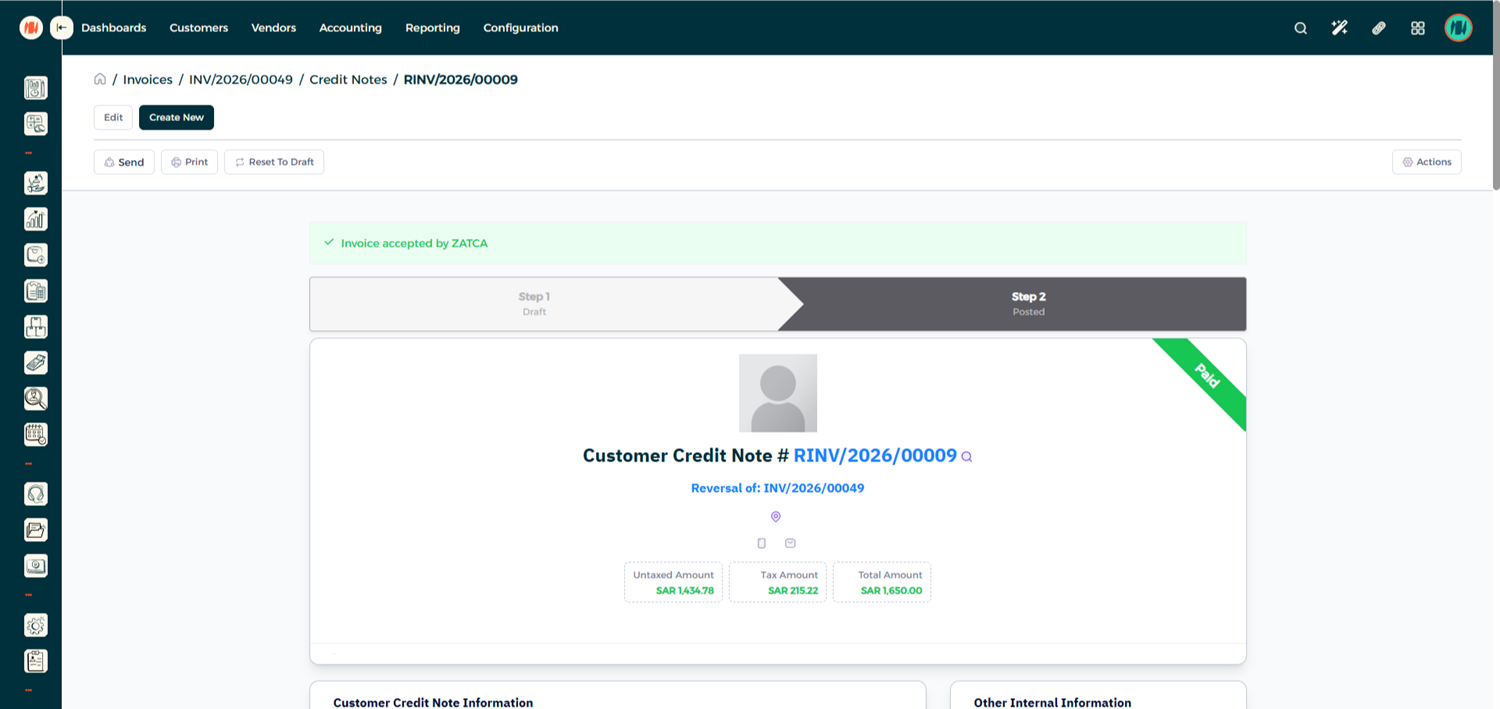
Click on it to view the credit note, which has also been automatically submitted to ZATCA.
Notes & Tips
- Always select the customer before completing a POS order to ensure proper invoicing records.
- POS transactions generate simplified invoices, while the system automatically creates the corresponding standard invoice in the backend.
- Refunds must include a ZATCA predefined refund reason for compliance.
- All POS invoices and refunds are automatically submitted to ZATCA through Invent ERP.